[Editor’s Note: This article has been updated to reflect 2023 best practices.]
We’ve all seen them. The ludicrously long, overly optimized articles that were clearly crafted for Google’s algorithm — and not for the actual person reading it on the other side. Recipe articles are comically guilty of this SEO sin. To up the time you spend on page and to try to play into the algorithm, recipe bloggers will bore you with a very loosely related, long and winding story about their childhood dog, when all you really want is a recipe for spinach dip.
And then there’s the jarring “cut/paste” articles which seek to answer every related question about a search intent under the sun. They wind up just being a hodgepodge FAQ page, devoid of any unifying threads or flow, real substance, or storytelling.
Don’t make content like this. You don’t have to. There’s a much, much better way to optimize on-page SEO in 2023. The methods outlined below help you ensure you’re ultimately creating content for a real person, while still satisfying the almighty algorithm. Your content gets found, and the actual person reading it finds value and entertainment in it, steadily building trust in your brand. It’s a win-win.
Here’s how to optimize on-page SEO in 2023, step-by-step. And once you’ve got a good grip on the below elements, be sure to grab your 2023 on-page SEO checklist to make optimizing each piece a breeze.
Step 1: Understand User Search Intent, and Tell a Great Story to Match it.
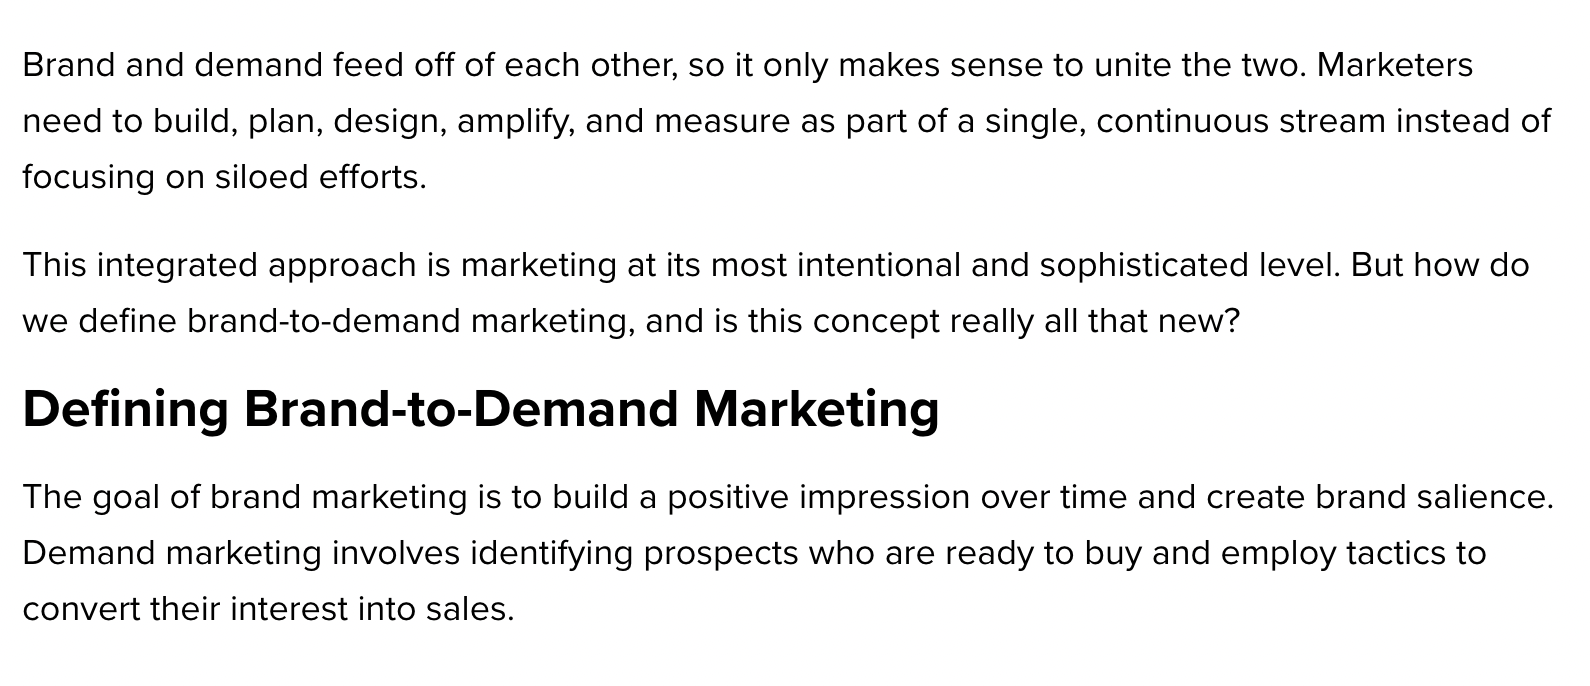
For the purposes of this how-to article, we’ll look at one of our very own top organic search performers as our example: What is Brand-to-Demand Marketing?
Determining your keyword strategy or topic clusters is a craft of its own. But once you’ve reached that point, and before you start writing, you’ll want to revolve your content around a specific user search intent.
In SEO, user search intent simply comes down to the angle of a user’s search query within a given topic, or the primary goal they’re looking to achieve with their search.
Let’s look back to our example. Brand-to-demand marketing is our topic cluster. If we think about everything a user would want to know about brand-to-demand marketing, we can easily break that into the “what?,” the “why?,” and the “how?” — a classic flow of introductory into complexity + execution that mimics the way people learn.
- By crafting a detailed story that effectively answers the “what?” and “why?” around brand-to-demand marketing, we effectively satisfy that introductory search intent — without overwhelming the user with the “how.”
- We save the “how” for its own detailed article to match that specific search intent, and would cross-link it within the introductory article.
- This also mirrors storytelling best practices by crafting an easy-to-follow plot line throughout your content that educates and entertains.
This technique also allows you to cover a specific intent in detail while telling a great story, supported by facts, figures, and a complete narrative. This way, you won’t find yourself attempting to rattle on or answer every search intent in the name of the algorithm — you’ll naturally wind up with a detailed exploration of that specific angle.
Step 2: Feature Your Primary Keyword in a Few Critical Locations, Naturally
This one is a straightforward one, but it’s where many content creators stumble. To try to get the algorithm to recognize what the article is about, they’ll “keyword stuff” an article, which detracts from telling a good story and makes your content a chore to read. Instead, try to feature your primary keyword, naturally, at these key locations:
In these examples, our primary keyword is “brand-to-demand marketing.”
Title tag
Your title tag is the text that constitutes the clickable URL on the SERP (search engine results page).
Headline
Your headline is the actual title of your article. More often than not, your title tag and headline will be identical, but some brands have specific distinctions for title tags, or you may find yourself using a condensed version of your headline as your title tag for optimal display (more on that in a minute).
Meta description
Your meta description is the little box of text that sits right beneath your title tag on the SERP. See if you can get your primary keyword toward the front of the description, naturally (note: this is primarily for your user/to indirectly enhance click rates — Google openly states it has no direct influence in the algorithm).
Body copy
Body copy refers to the actual copy within your article. When you write about a subject in-depth, you’ll naturally find yourself mentioning your primary keyword enough, without any need to “keyword stuff.”
Pro tip: Since we already established our article’s search intent is of an introductory, “101” nature, providing easy-to-jump-to definitions related to our primary subject is an ideal tactic.
Step 3: Make Your Meta Descriptions Read Like a Billboard
These days, Google actually rewrites meta descriptions based on the relationship between search query and content on the web page, cherrypicking from your on-page copy.
Nonetheless, it’s still a best practice to take a few seconds to optimize meta descriptions with your user in mind. Make them read like a billboard for the content within, using your primary keyword + verbs to put the user in the center of the narrative, setup their expectations, and entice a click.
See what I mean with springboard’s meta description:
Step 4: Get Your Character Counts Right
Remember, together title tags + meta descriptions effectively function as an ad for your content on the SERP. If they’re too long, they’ll automatically be truncated, which can look messy and incomplete, deterring users.
Stick to these counts for optimal display:
- Title tag: 60 characters or less
- Meta description: 155-160 characters
Step 5: Effectively Use H-Tags
H-tags are HTML elements that work to organize your web content in a hierarchy for optimal user experience. Ensure that you’re utilizing them correctly to break your content into logical subsections so users can flow through the page, jump around as they please, and ultimately find what they’re looking for, faster.
In this very article, you’ll see each subsection (denoted with H2s on the backend) is broken up by step to provide an ideal user experience.
Pro tip: You should only have one H1 tag, and it should be your article headline.
Step 6: Include Multimedia as Appropriate
In-line multimedia, in the form of images, videos, audio clips, and more, work to visually or sonically demonstrate what you’re trying to convey in copy, and in turn, increase user engagement and time spent on page.
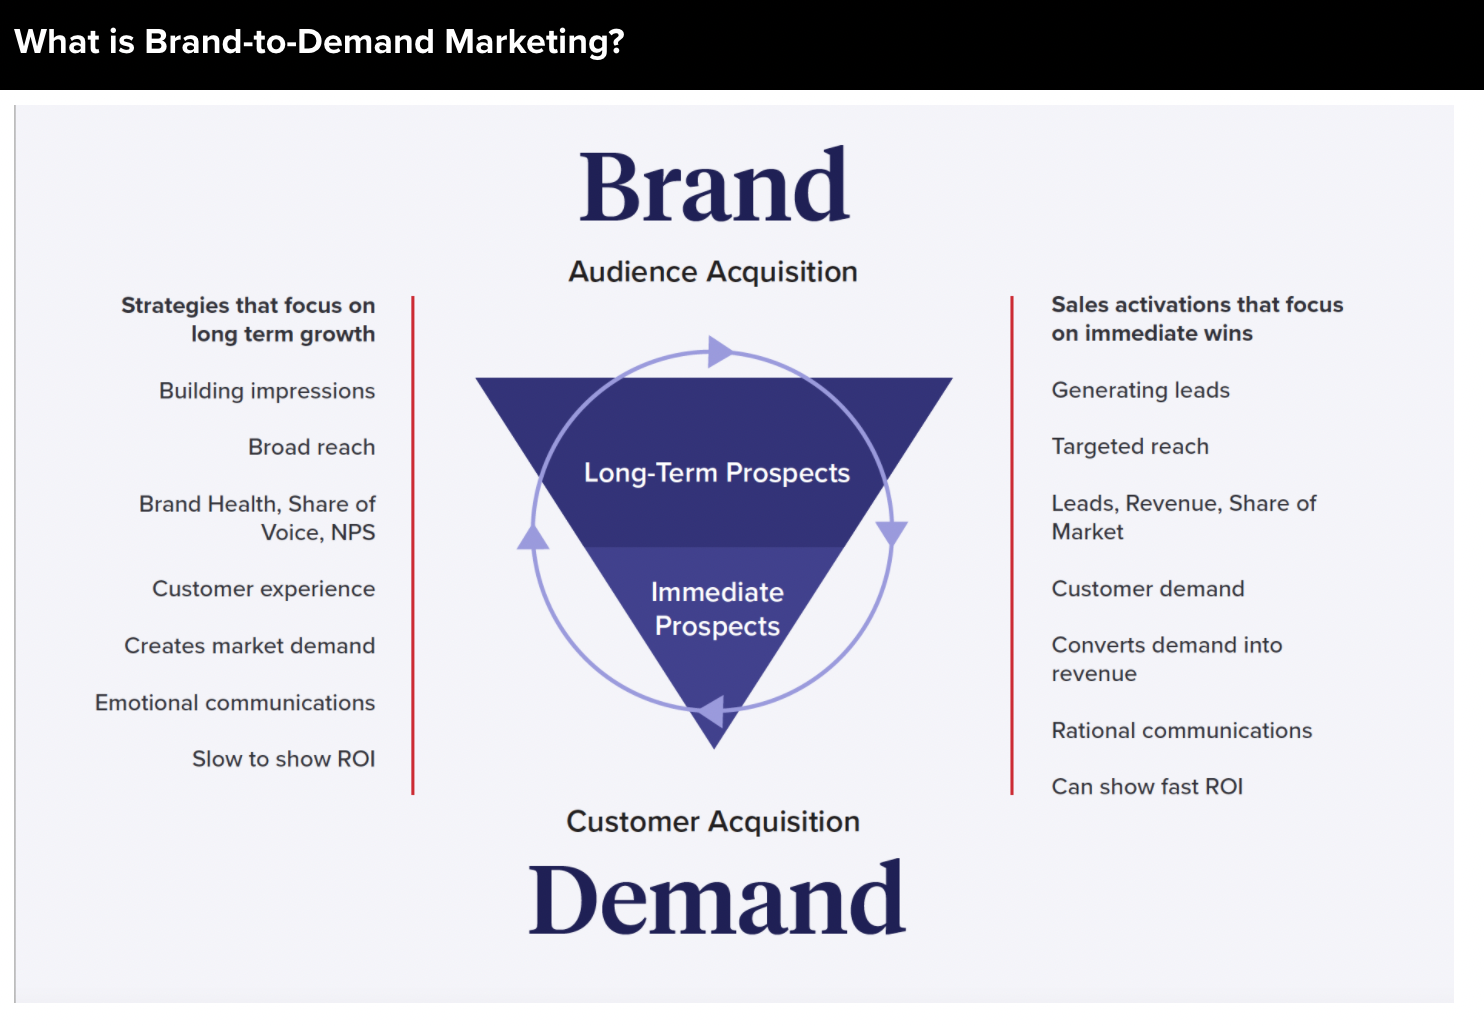
Sprinkle them in as appropriate — but don’t overdo it, or throw in a stock image for the hell of it. Ensure every piece of media you include is intentional and works to further your audience’s understanding of the subject, as evidenced in this image from our example article:
Pro tip: Pointing users to a video? Embed the video directly into your web-page so users can watch it within the article, instead of jumping to YouTube or another external site.
Step 7: Cross-Link and Point to Authoritative External Sources
Keep in mind the main goal of your content is to educate and provide value to your reader. Look across your own site to provide helpful cross-links to other articles/content that further the points you’re making to help educate your reader while simultaneously keeping them milling about your site.
And in the name of providing real value, don’t hesitate to externally link to authoritative sources on the subject.
While it might seem counter-intuitive to link to external domains, doing so is highly valuable to your audience and one of the most critical sources of ranking power.
Be sure the external domains you’re linking to are reputable and authoritative.
In this very article, we’ve provided internal links to other helpful content on our own site, as well as external links to expert insight from highly credible domains like Moz, Search Engine Journal, and Hubspot.
Step 8: Use Formatting to Break Clunky Paragraphs Into Easily Scannable Information
In our modern world, we’re used to finding exactly what we want, when we want it on the Internet — and if an article looks like one big wall of text, users might get overwhelmed and look elsewhere.
Traditional, long-form storytelling absolutely has its place still, especially depending upon your brand voice. But more often than not, you’ll want to lean on formatting elements like these to break your content into easily scannable info:
- Bulleted and numbered lists (just like this one!)
- Sub-paragraphs for subsections, using bold, italic, and underline to draw the reader’s attention to what that particular mini section is about
- Pull quotes to emphasize highly compelling quotes or critical info
Step 9: After Optimization, Go Back for a Gut Check
Welp, you did it! You’ve optimized all of the most important on-page elements to help boost your content’s search ranking. Time to pack it up and hang your SEO hat up for the day, right? Not so fast.
Many creators are quick to hit publish after optimization, but it’s always worth it to do one more post-optimization read-through to ensure the spirit of your story is alive and well, asking yourself the following questions along the way:
- Does my unique brand voice still shine through?
- Does my content provide solid value to my reader?
- Is my content still entertaining?
- Does my content speak on a personal level to my reader?
If the answer to any of the above is “no,” go back and edit in the name of great storytelling. If cutting out a few keyword mentions allows for better syntax and flow, do it. By putting priority on telling an entertaining and valuable story above all, you’ll naturally create content that delights your readers and ranks highly in SERP.
✅ Keep your 2023 on-page SEO checklist handy to roll through these steps for every piece of content you publish.
![]()


